
Additional materials are required if the optional design/build activity extension is conducted.
Group Size: 4
Activity Dependency: None
Subject Areas: Science and Technology
NGSS Performance Expectations:


Partial design process
Grade Level: 7 (6 – 8) Time Required: 2 hours(two 60-minutes class periods)
Group Size: 4 Subject Areas:NGSS Performance Expectations:

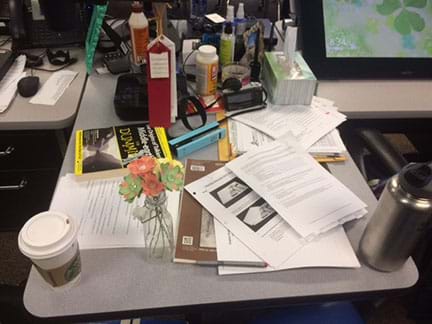
Students are introduced to two real-life problems that can be solved by using the engineering design process. For the first one, they follow along with a slide presentation that describes how a group of students built an organizer to help organize their teacher’s desk. The presentation introduces students to the key steps in the engineering design process. Next, in discussion groups, they read through a scenario in which middle school student Marisol struggles to keep their locker organized. They read the case study together, stopping and discussing at key points to share ideas and consider Marisol’s progress as they moves through the engineering design cycle to design and implement a solution. As an optional hands-on activity extension, students construct their own locker organizer using scrap materials. This introduction to the engineering design process sets up students to be able to conduct their own real-world design projects. A case study handout, group leader discussion sheet and slide presentation are provided. This engineering curriculum aligns to Next Generation Science Standards (NGSS).
This activity introduces students to the steps of the engineering design process. Engineers use the engineering design process when brainstorming solutions to real-life problems; they develop these solutions by testing and redesigning prototypes that work within given constraints. For example, biomedical engineers who design new pacemakers are challenged to create devices that help to control the heart while being small enough to enable patients to move around in their daily lives.
Each TeachEngineering lesson or activity is correlated to one or more K-12 science, technology, engineering or math (STEM) educational standards.
All 100,000+ K-12 STEM standards covered in TeachEngineering are collected, maintained and packaged by the Achievement Standards Network (ASN), a project of D2L (www.achievementstandards.org).
In the ASN, standards are hierarchically structured: first by source; e.g., by state; within source by type; e.g., science or mathematics; within type by subtype, then by grade, etc.
MS-ETS1-1. Define the criteria and constraints of a design problem with sufficient precision to ensure a successful solution, taking into account relevant scientific principles and potential impacts on people and the natural environment that may limit possible solutions. (Grades 6 - 8)
Do you agree with this alignment? Thanks for your feedback!
Alignment agreement: Thanks for your feedback!
Alignment agreement: Thanks for your feedback!
Alignment agreement: Thanks for your feedback!
The uses of technologies and any limitations on their use are driven by individual or societal needs, desires, and values; by the findings of scientific research; and by differences in such factors as climate, natural resources, and economic conditions.
Alignment agreement: Thanks for your feedback!
MS-ETS1-4. Develop a model to generate data for iterative testing and modification of a proposed object, tool, or process such that an optimal design can be achieved. (Grades 6 - 8)
Do you agree with this alignment? Thanks for your feedback!
Alignment agreement: Thanks for your feedback!
Alignment agreement: Thanks for your feedback!
The iterative process of testing the most promising solutions and modifying what is proposed on the basis of the test results leads to greater refinement and ultimately to an optimal solution.
Alignment agreement: Thanks for your feedback!
Each group needs:
To share with the entire class:
Visit [ www.teachengineering.org/activities/view/usu-1961-everyday-problems-introduction-engineering-design ] to print or download.
(Have the 19-slide Introduction to the Engineering Design Cycle Presentation, a PowerPoint® file, ready to show the class.)
Have you ever experienced a problem and wanted a solution to it? Maybe it was a broken backpack strap, a bookshelf that just kept falling over, or stuff spilling out of your closet? (Let students share some simple problems with the class). With a little bit of creativity and a good understanding of the engineering design process, you can find the solutions to many of these problems yourself!
But what is the engineering design process? (Listen to some student ideas shared with the class.) The engineering design process, or cycle, is a series of steps used by engineers to guide them as they solve problems.
(Show students the slide presentation. Refer to the notes under each slide for a suggested script and comments. The slides introduce the main steps of the engineering design process, and walk through a classroom problem—a teacher’s disorganized desk that is preventing timely return of graded papers—and how students devise a solution. It also describes the work of famous people—Katherine Johnson, Lee Anne Walters, Marc Edwards, James E. West and Jorge Odón—to illustrate successful examples of using the steps of the engineering design process.)
Now that we’ve explore the engineering design process, let’s see if we can solve a real-world problem. Marisol is a high-school student who is very excited to have their own locker. They have lots of books, assignments, papers and other items that they keep in their locker. However, Marisol is not very organized. Sometimes they are late to class because they need extra time to find things that were stuffed into their locker. What is Marisol’s problem? (Answer: Their locker is disorganized.) In your groups, you’ll read through Marisol’s situation and see how they use the engineering design process to solve it. Let’s get started!
Background
This activity is intended as an introduction to the engineering design cycle. It is meant to be relatable to students and serve as a jumping off point for future engineering design work.

Engineers follow the steps of the engineering design process to guide them as they solve problems. The steps shown in Figure 1 are:
Ask: identify the need & constraints
Research the problem
Imagine: develop possible solutions
Plan: select a promising solution
Create: build a prototype
Test and evaluate prototype
Improve: redesign as needed
Some depictions of the engineering design process delineate a separate step—communication. In the Figure 1 graphic, communication is considered to be incorporated throughout the process. For this activity, we call out a final step—communicate the solution—as a concluding stage to explain to others how the solution was designed, why it is useful, and how they might benefit from it. See the diagram on slide 3.
For another introductory overview of engineering and design, see the What Is Engineering? What Is Design? lesson and/or show students the What Is Engineering? video.
Before the Activity
With the Students
brainstorming: A team creativity activity with the purpose to generate a large number of potential solutions to a design challenge.
constraint: A limitation or restriction. For engineers, design constraints are the requirements and limitations that the final design solutions must meet. Constraints are part of identifying and defining a problem, the first stage of the engineering design cycle.
criteria: For engineers, the specifications and requirements design solutions must meet. Criteria are part of identifying and defining a problem, the first stage of the engineering design cycle.
develop : In the engineering design cycle, to create different solutions to an engineering problem.
engineering: Creating new things for the benefit of humanity and our world. Designing and building products, structures, machines and systems that solve problems. The “E” in STEM.
engineering design process: A series of steps used by engineering teams to guide them as they develop new solutions, products or systems. The process is cyclical and iterative. Also called the engineering design cycle.
evaluate: To assess something (such as a design solution) and form an idea about its merit or value (such as whether it meets project criteria and constraints).
optimize: To make the solution better after testing. Part of the engineering design cycle.
Pre-Activity Assessment
Intro Discussion: To gauge how much students already know about the activity topic and start students thinking about potential design problems in their everyday lives, facilitate a brief class discussion by asking students the following questions:
Activity Embedded Assessment
Small Group Discussions: As students work, observe their group discussions. Make sure the group leaders go through all the questions for each section, and that each group member contributes to the discussions.
Post-Activity Assessment
Marisol’s Design Process: Provide students with writing paper and have them write “Marisol’s Design Process” at the top. Direct them to clearly write out the steps that Marisol went through as they designed and completed their locker organizer design and label them according to where they fit in the engineering design cycle. For example, “Marisol had to jump back to avoid objects falling out of their locker” and they stated a desire to “wanted to find a way to organize their locker” both illustrate the “identifying the problem” step.
To make this a more hands-on activity, have students design and build their own locker organizers (or other solutions to real-life problems they identified) in tandem with the above-described activity, incorporating the following changes/additions to the process:
Get the inside scoop on all things TeachEngineering such as new site features, curriculum updates, video releases, and more by signing up for our newsletter!
PS: We do not share personal information or emails with anyone. Subscribe to TE NewsletterEngineering Design Process. 2014. TeachEngineering, Web. Accessed June 20, 2017. https://www.teachengineering.org/k12engineering/designprocess
This material is based upon work supported by the National Science Foundation CAREER award grant no. DRL 1552567 (Amy Wilson-Lopez) titled, Examining Factors that Foster Low-Income Latino Middle School Students' Engineering Design Thinking in Literacy-Infused Technology and Engineering Classrooms. Any opinions, findings, and conclusions or recommendations expressed in this material are those of the authors and do not necessarily reflect the views of the National Science Foundation.
Last modified: October 26, 2023
Free K-12 standards-aligned STEM curriculum for educators everywhere.
Find more at TeachEngineering.org


Use of the TeachEngineering digital library and this website constitutes acceptance of our Terms of Use and Privacy Policy.
*The NGSS logo is a registered trademark of WestEd.
Neither WestEd nor the lead states and partners that developed the NGSS were
involved in the production of TE, and do not endorse it.